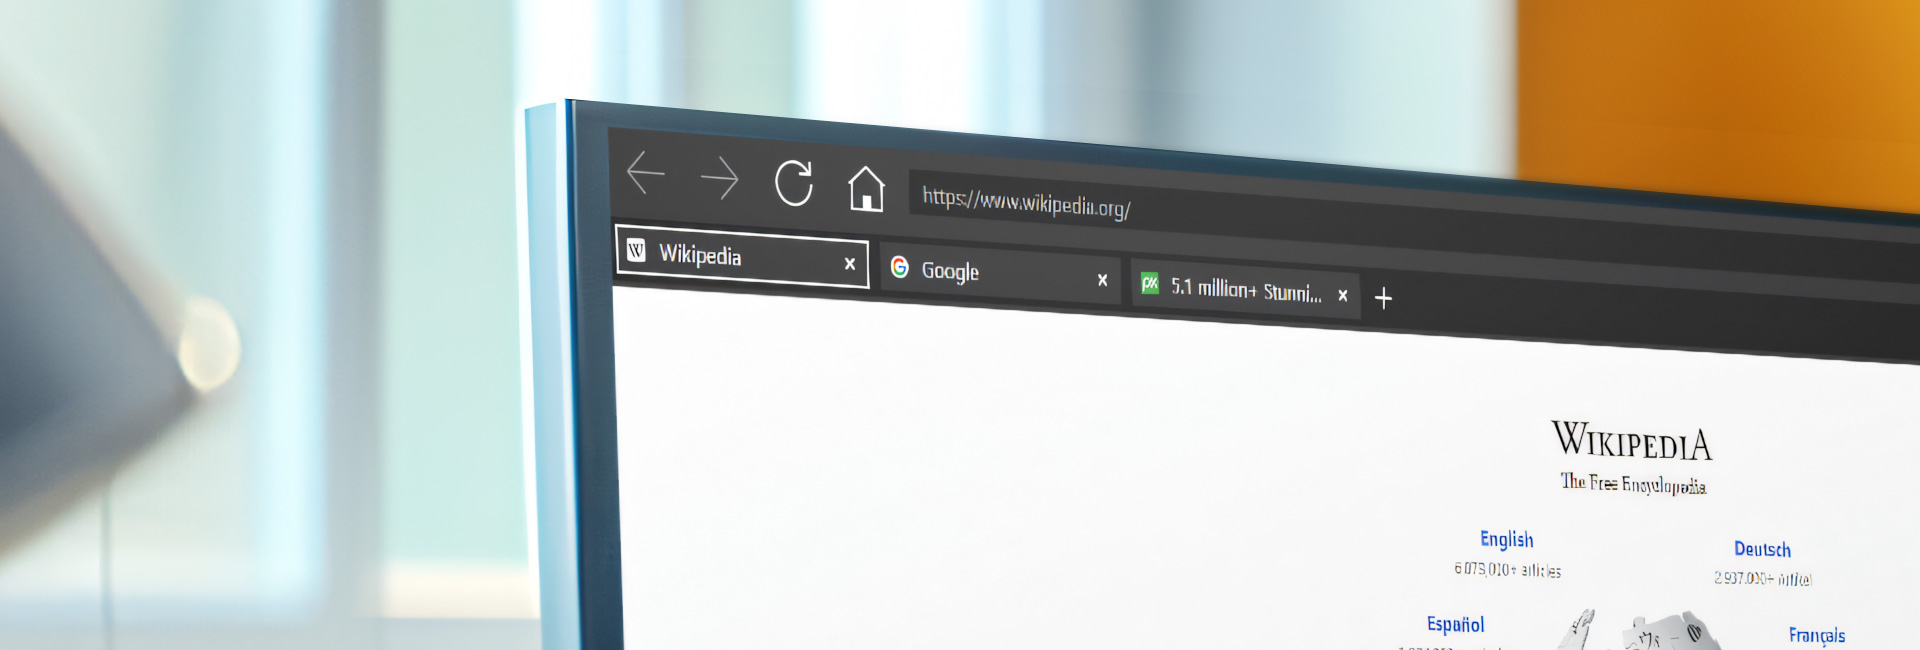
Normally, the SiteKiosk browser starts with a defined start page.
This Article explains how to configure the SiteKiosk Online Browser to automatically start with multiple browser tabs, each set with individual URLs.
Note: This article only works for SiteKiosk Online Windows
1. Necessary Project Settings
1. Create a new project and use the browser template
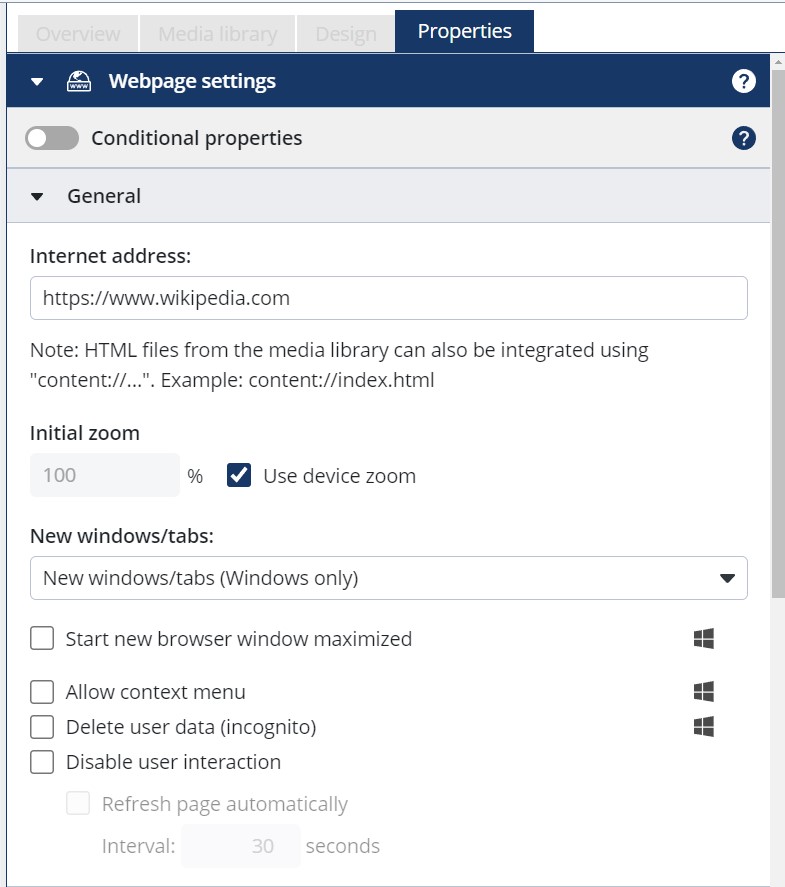
2. Insert any address in the ‘Internet address’ line in the website settings
(e.g.:https://www.wikipedia.org)
3. Click on Save and close the properties dialogue
2. Activate Expert Mode
Note: Expert mode is required for the next steps
1. Add &expert to the end of the displayed SiteKiosk.online URL in your browser
2. Highlight the entire URL and press the Enter key to reload the page
3. The SiteKiosk Online editor is now in expert mode

3. Insert Script for displaying the tabs and the desired URLs
1. Go now to the Expert area in the project settings
2. Click on the ‘+ Add’ button
3. Remove the existing script and insert the following lines:
__siteKiosk.browsers.on(__siteKiosk.browsers.events.created, browser => {
  browser.createTabForUrl("https://www.google.com");
  browser.createTabForUrl("https://pixabay.com");
});
4. Click on Save
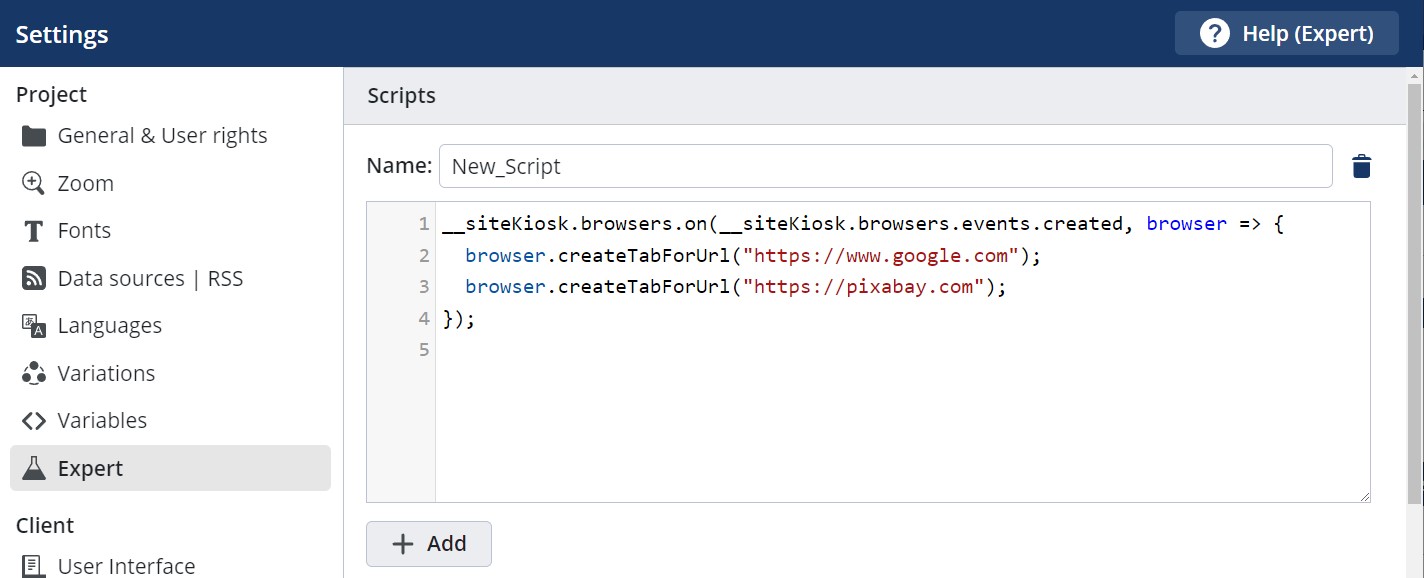
Additional tabs can be added by adding the following line to the script:
browser.createTabForUrl("https://sitekiosk.com");
Enter the desired URL in the brackets.
Note: The automatic display of the tabs is disabled by deleting the respective line.
4. Publish the project
Deploy the project to test if the assigned URLs are automatically displayed in tabs.